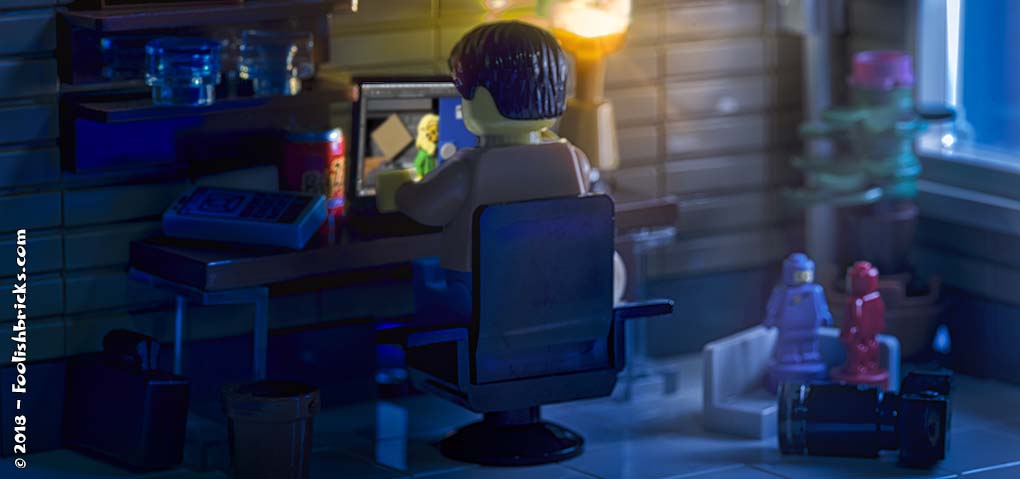
Definite guide to creating a Lego comic
Original: May 22, 2018
latest: February 12, 2022
How to create your own Lego comic?
Are you thinking about creating your own Lego comic? This article will get you started. I will discuss the most important elements needed to create a Lego comic (or brick comic, as named within the AFOL community).
Making mistakes and learning from them is one way to improve, and over the years, I’ve made many mistakes. This article describes everything I learned by creating the Foolish Bricks comic.
This article is a general overview of the complete process of contemplation to publishing your brick comic. I will regularly update it to reflect my latest insights. Also, I will discuss many subjects in this post in separate, more in-depth articles.
TABLE OF CONTENTS
- What budget will you need to create a Lego comic.
- What equipment do you need.
- Getting ideas for your comic.
- Developing your story.
- Writing a script for a brick comic.
- Building the stages.
- Photographing Lego – Basics.
- Photographing Lego – Advanced.
- Post-processing your Lego photos.
- Assembly of a Lego comic.
- Sharing you brick comic.
WHAT BUDGET DO YOU NEED TO CREATE A LEGO COMIC?
First, decide what quality you want your comic to be. Next, determine the amount of money and time you will need to budget to create the comic according to the standard you’d like.
What quality do you want your Lego brick comic to be?
People often only consider the financial budget. However, there is another, arguably more important, commodity you will need to budget, your time!
The quality you want to bring to your comic will determine your budget. Quality has many aspects, amongst others: story, photography, composition of the comic, website and consistency of publishing. At first, it is best to prioritize, concentrating on one or two of these elements. When your comic is up and running, you can improve the other elements. When I started the Foolish Brick comic, I only concentrated on efficiency; how could I publish episodes consistently twice a week using the least amount of time necessary?
What financial budget will you need for your Lego comic?
You don’t have to be a millionaire to create a Lego brick comic. You can create a brilliant comic with a couple of minifigures in a ‘normal world’ backdrop. For this, you can use natural lights or the lamps you have lying around. Also, you can use your smartphone as a camera. Furthermore, there is free software available for post-production of your photos and for assembling the comic. Finally, you can publish your brick comic on a free website. There are awesome Lego comics out there made on a small to modest budget.
On the other end of the spectrum, you can go for a professional camera and objectives, specialized studio lights, tons of Lego, a high-end computer with premium software, etc. It doesn’t mean your comic will be better than the low-budget ones. My belief is that knowledge and time are the prime commodities necessary to create.
Ultimately, you can make it as expensive or low-cost as you want. I recommend start small, focusing on one or two elements. Eventually expanding over time, each time focusing on a certain aspect of your comic.
How much time are you willing to spend on your comic?
Anticipate the time you want to put into creating your Lego brick comic! At first, I gravely underestimated the time that went into creating my comic. Balance your time and be realistic. Be careful pressuring yourself with tight time-constraints, for example, by having a too high posting-frequency. This is your hobby. Creating your comic should preferably be relaxing.
WHAT EQUIPMENT DO YOU NEED TO CREATE A LEGO COMIC?
To get your Lego comic up and running, you’ll need some essential equipment. What exactly you’ll need depends on your specific needs, location, and funds.
Below, a basic list of essentials.
Lego. This goes without saying. To my surprise though, I found a Lego comic produced without the use of Lego. The artist used the Lego Digital Designer (LDD) software.
Photo Camera. This goes without saying too. There are many options available, like a smartphone, compact camera, system camera, mirrorless camera, or Digital Single Lens Reflex-camera (DSLR). Each camera has its own advantages and disadvantages. Choose based on a combination of budget, size and weight, amount of configuration options, availability of lenses, and quality of photos. I use a DSLR (Pentax K-1).
Lenses. If you use a camera with separate lenses, you’ll need to put some thought into which lenses to buy. There are many options available in different price classes and quality. I mostly use macro-lenses, portrait-lenses, and a probe-lens. I still remember the moment I got my first macro-lens. It resulted in a landscape shift of quality of my photography.
Tripod. A tripod is crucial to get the sharpest photos! A tripod is also essential for some of the trick photography if you are into that.
Lighting. My favourite light comes from natural light sources. But if you want better control of your lighting, you’ll need artificial lights. At first, many lights in and around your house will suffice. When you want to take a step up, you’ll have two major classes of lighting to choose from: continuous lights or flash.
Studio. Well, not exactly a studio, but it helps to have a dedicated location in your house to use for your photography. A place where you can leave everything as it is between photography sessions.
Computer, including software. Though some people create and upload their comic only using their smartphone, I could not do without my computer. There are several categories of software that might be useful. Amongst others, photo-editing software (Photoshop, Gimp, Darktable, Lightroom), software to compose your comic (Comic Life, Photoshop, Illustrator), software for scripting your comic (Any word processing software, any note software, Scrivener, Final Draft, Fade-in), and website design and ftp software (Dreamweaver, Filezilla, transmit). When I started my comic, I used Photoshop, Microsoft Word, Comic Life and Dreamweaver. Over the years, my workflow changed drastically, so now I use Bear, Scrivener, Illustrator, Photoshop, Transmit and WordPress.
Accessories. Softboxes, camera remote (highly recommended), tape, wire, color-gels, light-shaping equipment (like snoots, barndoors, grids), sticky tack, support gear for lights and other equipment (like mounts, stands, clips, and clamps), powder brush (for removing dust), etc.
HOW TO GET IDEAS FOR A LEGO COMIC
Finding ideas for your comic can be challenging. For me, this is the toughest part of the process, and I use a combination of techniques to overcome my difficulties.
What kind of Lego comic do you want to create?
Before you do anything, ask yourself what kind of Lego comic you want to create. Short stories, or a long epic story, an ongoing series with specific characters or setting, a soap-opera, short 3-4 panel gags, etc. Maybe you’d like a combination. Each of these many options has different consequences for the way you’ll want to develop your story.
Record your ideas for a story.
Ideas for stories come at the most peculiar times. I’m always prepared to record them. I used to carry a good old-fashioned notebook with me. Now, I use a cross-device-syncing notes app. Many people use Evernote, but, my favourite note-taking app is Bear (Apple only). there are many note-taking apps and as long as your preferred app synchronises fast between your phone and your computer, you’re good to go.
How to get inspiration?
There are many approaches to discover useful story ideas. The most obvious advice is to watch a lot of movies, read books and comics/ graphic novels. Aim to find out what the movie, book or comic really is about. Can you discover the common themes and story structure? More on story structure in paragraph 4. Be sure to not simply copy/ paste a story. Always create your distinct own stories.
The aforementioned technique is a great way to get inspired. However, to do this regularly, you need a lot of time, which I don’t have. I read the flaps of books, abstracts and such. Concerning movies, I scroll through the synopsis on the net, like IMDB or Wikipedia.
You can also combine the basic ideas of books, films and comics. For example; “A zombie run bar” = Walking Dead meets Cheers; “Two bad-ass cops blow thing up in space” = Lethal Weapon meets Star Trek. There are endless possibilities.
Popular amongst Lego brick comic creators is using a well know setting and creating a Lego counterpart. There are, for example, Harry Potter Lego Comics, or comics based on a mixture of Star Trek and Star Wars. This is a simple way of starting out in a fleshed out world with established characters. Though, mostly, during the run of your comic, most things will probably change according to your own personal preferences.
Another possibility is doing research on things you like. For me, subjects would include; Mythology (I love Greek Mythology), mysterious places in the world, local folklore, secret organisations, etc. Reading up on subjects you like will probably spark basic ideas.
Sometimes I set an alarm clock for ten minutes and just start writing, ideas, words, connections, names, ect. There is no right or wrong. I keep writing for the whole ten minutes. I don’t stop, cross nothing out, and don’t think. After ten minutes, I make connections and see if anything viable is in there. Most of the times, I am amazed by what my brain brought up!
I mentioned only a few possibilities of the countless techniques to get inspired for your comic. Using (a combination of) these techniques should get you going.
DEVELOP A STORY FOR YOUR LEGO COMIC
You can develop your story in several ways. However, some develop no story at all and simply start shooting their comic, not knowing where it’ll end up. Others write a basic story-line and leave the minor elements for later. And some write every detail before starting shooting photos. All methods have their own pros and cons, and it’s up to you to choose. Remain flexible though. Change the script whenever you run into problems whilst shooting the comic. I wrote the first season of the Foolish Bricks Comic on the fly, the second and third season have a basic story-line.
Whatever option you choose, I urge you to write with the end in mind! Have a goal to work towards. I created the first season of my Lego comic without an end in mind and, oh boy, did I mess up the ending. It’s also easier to remain flexible when rewriting the script if you have an ending in mind. This works for the long and short stories, it also works for scenes and storylines in a soaplike story.
Write a premise line
The premise line is a primary guide for developing long stories. It helps you to determine what your story is about. Develop a premise line before you writing your story. It contains, amongst other components, the primary story structure, important character(s), conflict and ending. If you develop a good premise line, you can always return to it if you’re stuck writing your story. I wrote an in-depth article on the premise-line.
Decide on a story structure
If you go for a longer story, you may outline the story after writing a premise-line. Many story structure templates are available. Some are for movies -like ‘Save the Cat’- and some are more general -like ‘The writer’s journey’.
I like the structure as described in ‘The writer’s journey’ by Christopher Vogler. Even if you don’t want to use a story structure, this book is an enjoyable and interesting read.
Some people argue that using these templates may lead to formulaic writing. While that may be partly true, many of the stages described in such a template can be broadly interpreted, leading to many variations. Besides, you can always deviate from templates. You can change them, add elements or leave parts out. Nobody forces you to use all components. In the end, these templates are here to help you, and if you get stuck in your writing, it is good to have some structure to fall back to.
WRITE A SCRIPT FOR YOUR LEGO COMIC
In a script, you’ll write the field of view, action, and dialogue. Include key elements and characters that need to be in a panel and episode. Through the script, the look and feel of individual panels come to life. I can see the photographs in my mind before I set them up and shoot them.
When writing the script, you’ll decide on the composition of your scenes and panels (including camera-shots and angles). Another essential component of the script is getting the dialogue clear. Knowledge about how many and who’s dialogue goes into what panel is crucial to the composition of the photos. For example, will person A need to be on the left or right from person B, how much room will I need in the photo to place my intended dialogue, etc.
I rarely have the script for the entire comic ready before shooting. But it is good to have at least one complete scene scripted before shooting one or more episodes within that scene.
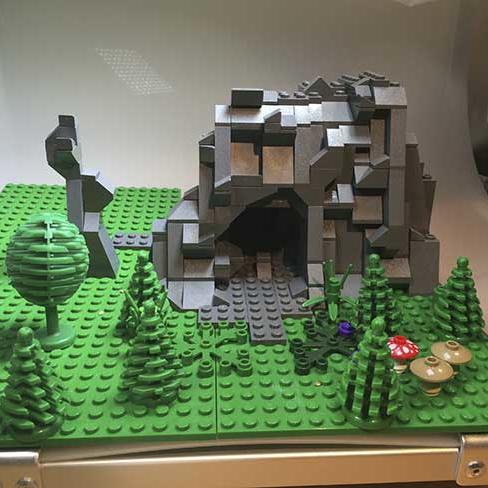
BUILD STAGES FOR YOUR LEGO BRICK COMIC
Once you know where your story will bring the characters, it’s time to build one or more stages. This is assuming that you will build your stages from Lego bricks. If you want to save some time, you can use (modified) official Lego sets. Of course, you can also choose to incorporate non-Lego environments in your comic.
When I build sets, I consider what will be visible in the panels. This will partly depend on what camera shots, angles, and aperture settings you planned. These considerations also determine the amount of details I deem necessary.
The size of your stages is a matter of preference. At the smallest, I build ‘through the lens’. This means I only build what I can see through the lens. My largest sets are the ones I expect to use more than once.
I’ve built many stages, some better than others. There are blog posts on the stages from the first season of the Foolish Lego brick comic and Dwaas’ house in the second season.
PHOTOGRAPHING LEGO – BASICS
In this paragraph, I’ll present several aspects to keep in mind when photographing Lego.
Exposure; shutter, aperture, and ISO
Let’s start with the basics. Photography is about capturing light, and the amount of light captured by your camera is called exposure. A photo with normal exposure resembles the lighting our eyes see. Overexposure happens when too much light reflects into the camera, resulting in a brighter photo. Underexposure happens when little light enters the camera, resulting in a dark photo. Exposure is directly related to the bright- and darkness of (parts of) your photos and thus your comic panels.
The three factors which control exposure are; changing the amount of light on (parts) of your stage, changing aperture settings (also influencing depth-of-field) and changing shutter-speed. You can also brighten a photo by changing the ISO-settings. However, ISO is not a part of exposure itself, since it does not influence the amount of light that reaches your camera sensor. It solely brightens the image after the sensor has already been exposed to light.
Last, I want to stress that the right exposure is not the same as normal exposure. Often I purposely want to over-or underexpose (parts) of a panel, related to the mood I want to create in a panel. Use the exposure-settings that are best to tell your story.
I wrote extensive beginner guides on exposure, shutter, aperture, and ISO. Next, a few other basis rues to keep in mind.
Lighting the scene – basics
There are many guidelines describing how you could light your scenes and characters. When you just started your comic, it is most important to ensure that at least the most important elements in a panel are well lit. Besides, ensure consistent lighting between panels and episodes of your brick comic.
Choose if you want to use natural light, continuous studio lights or flash to light your scenes. These types of lighting all have pros and cons. I used to only work with continuous lights combined with natural lights. Now I favor flash, and when the situation demands it, I combine flash with continuous lights.
Dealing with reflections
Lego bricks reflect light like crazy. Just when I think I’ve got your scene lit correctly, unwanted reflections are posing problems, especially the heads of Lego minifigures.
I try to diminish reflections by moving or tilting the lights or the object that has the annoying reflection. Especially tilting the minifigure or moving the culpable light source works extremely well to reduce undesirable reflections. Another option is diffusing the lights.
If you can’t get rid of all unwanted reflections, ensure that crucial elements show as little as possible reflection (like the middle of the head). Thereupon, you can try to remove the remaining reflections in post-production.
Have your subject in focus.
The primary subject of your panel should be in focus! It’s a minor effort, but makes your photos look so much better! Blurry faces of the main character within that panel will look as if you don’t care about quality. Of course, there are exceptions to this rule, but these exceptions are always intentional and related to a specific message to convey.
Composition
Composition is the way you arrange your scene. There are several compositional guidelines you can use to increase the impact of your scene. Remember, these are not rules and you may deviate from them. Sometimes the deviation from photo composition guidelines makes a particular scene come to life.
Some of the more well-known guidelines are: the Fibonacci-spiral, rule of thirds, golden ratio, centred composition/ symmetry, leading lines, rule of space, balanced elements and the use of negative space. If you’d like to step up your photography, learn about these guidelines.
Leave room for dialogue
Do not forget to leave room in the panel to add text-balloons. I create the text-balloons before I shoot the pictures. That way I can already visualize the space necessary for text, besides it helps in determining the flow of the episode.
Relationship between panels
Finally, when dealing with multiple panels within one scene, consistency is important. Remember where everybody should be from panel to panel. And don’t forget to move the world along with the central characters within the scene. If you only move your characters and leave everyone else untouched, it will look like time has stopped.
PHOTOGRAPHING LEGO – ADVANCED
Once you have the basics down, you can concentrate on the storytelling. Below I’ll touch upon a few aspects to get your message across to readers.
I wrote an extensive article with examples on storytelling with Lego-photography that, amongst other things, covers topics like focusing on the hero, framing, color-temperature, plastic emotions, the amount of details, and contrasting information. Be sure to read it, if you are interested in this topic.
Camera shots and angles
Camera shots are about how much of the subject and its surrounding area is visible in one panel. Using the relatively well-known long shots, medium shots and close-ups will take you a long way. Camera angles provide the camera shots at different angles (like high angle, low angle, eye-level, Dutch angle, overhead shot). When in doubt, photograph the minifigures from their perspective! minifigure eye-level is the way to go.
Dynamic use of camera shots and angles is very effective for adding subtexts to your panels. For example, you can help readers focus on elements in the panel that are important for the story. You can also create tension and drama. Likewise, you can manipulate, deliberately confuse, or mislead your readers. A nice side-effect of varying camera shots and angles is that is makes the episodes look a bit more attractive. Many Lego brick comics have episodes showing multiple panels visually similar and uninteresting.
Read all about camera shots and angles in Lego photography.
Lighting for storytelling
Correct lighting is essential for your story to be instantly clear. You can use your lights to present your story, set the mood and stylize your photo. A simple, yet extremely effective technique is to light the most important story-element with the brightest lights and the most contrast. Point your lights on all elements that are important to the story. All less important elements should be less lit and with less contrast than the major story-elements. In addition, contrasts and partial lighting within a photo can provide all kinds of subtexts and influence the overall mood of a scene.
Color temperature
Color temperature is crucial to convey the mood and atmosphere of a scene. For example; if you shoot a panel in yellowish light, you will convey a sunny day, maybe even happiness of your characters. Shoot the same panel in white blue-ish light and you will convey coldness (or a distant relationship between characters). Red may convey warmth or danger, a minifigure shot in a green environment might look sick (or it might seem like the environment is sick or something is terribly wrong). More information on color temperature is in this article.
Guide the viewers’ eye
Leading the viewers’ eyes through your photo. More precisely, try to draw the viewers’ eyes towards points of interest in your photo by using one or more techniques, related to lighting, contrasts, depth of field, leading lines and frames.
POST-PROCESSING OF YOU LEGO PHOTOS
After I have shot all photos for my panels, I always do post-processing on my photos. Try to keep image editing to a minimum. It’s best to get a photo right predominantly in camera.
Shoot in RAW
If your camera has a RAW-setting, shoot your photos in RAW-format! Thus, the most information is incorporated in the photo, which is extremely important for post-processing. For the same reason, always shoot in the highest quality.
Cropping
Through cropping you can correct or fine-tune a panel’s composition. Note that when you resort to cropping, your photo should have a large enough pixel-size otherwise you might lose quality.
Removing reflections and other imperfections
I discussed the reflections before. Mostly the ‘other imperfections’ come down to removing specs of dust I didn’t notice with my bare eyes. Try to remove dust before photographing Lego. I use a powder-brush for this.
Several corrections
Correct aspects like lighting, colors (including color-temperature and color-grading), sharpness, etc., when necessary. Don’t overdo this unless intentional. I try to keep these corrections to a minimum unless the story asks for a specific style.
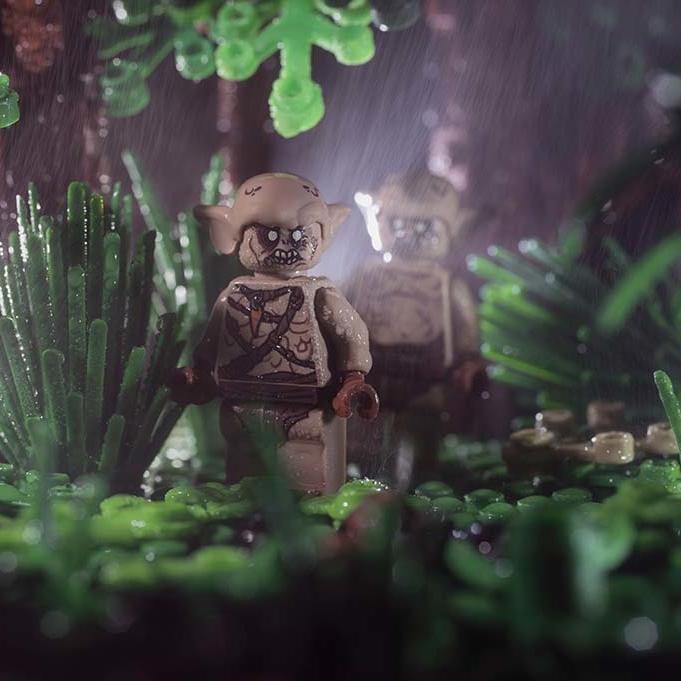
Special effects
Special effects are always cool to incorporate in a comic, as long as you don’t overdo it and keep it related to the story. Ghosts, light sabers, light-beams, lightning, rain, flying objects/ minifigures, explosions, walking through walls. Whatever you can think of, it is possible. There are several behind-the-scenes posts with examples on this site.
ASEMBLE YOUR LEGO COMIC
Everything we discussed comes together when you create the actual comic. You’ve written and created all elements like script; panel layout; photos, and dialogue. Next, construct and tweak each panel and episode until you’re happy with the result.
There are several options for software, as stated in the paragraph on equipment. I use Adobe Illustrator for this part of the process. After I complete the episode, I export to Photoshop, add copyright-information, and optimize the image for uploading.
SHARE YOUR LEGO COMIC
I presume you want to share your comic with other people instead of keeping all your awesomeness to yourself. You have several options to do this.
Your own website
I highly recommend setting up your own website. It is a lot of work at first, and it may be difficult to get some traffic towards your website. But in the end your Lego comic deserves its own home on the Internet. A home where you, as creator, are in charge and independent of how others believe your creation should be treated.
These days it is fairly simple to get a simple website going. There are many options for websites. You could also work with a (low-cost) provider. I recommend using WordPress with the comic-press theme or another theme of combined with the comic-easel plugin.
Social media
There are a few Lego brick comics published media like Instagram and Flickr. Yet, I am not a fan of giving all control to a third party. I’d rather decide myself how I present my comic to my readers.
Besides losing control, there are other disadvantages. For instance, Instagram messing up the chronological order of the episodes, or the absence of adequate navigation (try to get to the first episode of a Lego comic on Instagram as fast as possible). Conversely, it is easier to build a large audience fast. Currently, I don’t recommend social media to post your comics. You can use social media to promote though!
Forums
I have seen a few comics shared on a forum. This outlet may be nice if you have a few experimental comics and you want some feedback from like-minded people. However, if you are getting serious about posting a longer run of Lego brick comics, go for one of the other two options.
In conclusion
I wrote an overview of many aspects to consider if you’d like to create your own Lego brick comic. Not all aspects are equally important, and it is up to you to use and ignore whatever I wrote. The crucial element of creating a Lego comic: have fun! Enjoy conceiving, creating, and publishing your own comic.
So, what are you waiting for? Go off and create your own brick comic! And don’t forget to let me know if you do! That way I can read your comic and add your production to the ultimate list of Lego brick comics.
I will update this article periodically and link to in-depth articles on several subjects mentioned here.
OTHER POSTS THAT MIGHT INTEREST YOU;
You can subscribe to the newsletter to receive occasional updates from Foolish Bricks.
I’m considering making a Lego comic at some point in the near future. This seems like it could be an invaluable resource, so thanks so much for making it!
Thanks! I hope my blogs will be of help. Make sure to let me know when your comic is up and running!
Why didn’t you mention in the article the possibility of publishing the comic as a book? I have already published two Lego comics as books and sold them, and from the second book I even made a little profit (not enough for the investment, but I enjoyed the creation anyway)
Primarily, I wrote the guide on creation, not so much on publication. I did however add the online publishing as a way of getting the comic out there.
There are multiple reasons I didn’t write about publishing, firstly, I did not have experience on that and I don’t know the ins- and outs. Also, I don’t know the legal implications because when publishing (and even making a profit), I don’t know what the implications of using TLGs’ intellectual property is. TLG is known to sometimes come down hard on people who (indirectly) make money by using Lego Bricks (like Etsy shops, photo-sales, etc) and even non-profit (For example, I was once asked to shoot a Lego photo as illustration for a medical article in a renowned medical journal, however in the end they didn’t use the photo for legal reasons).
Anyway, the possibility is there, I just don’t know the details.